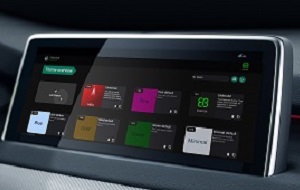
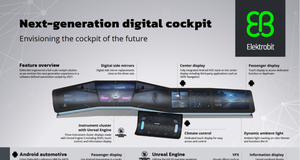
The Virtual IVI Development for Android is a full digital twin for cockpit systems, now available as a service via AWS. It allows you to develop and debug Android-based target applications on a digital twin with full compatibility to hardware deployments.
Scale your Android Automotive development and testing capabilities by spinning up any number of instances.
User guide
Before you start
This guide assumes you are already familiar with AWS and know how to use, start, and connect to a plain Ubuntu EC2 instance.
The AWS Marketplace product is available here: Virtual IVI Development for Android™ (Note: Currently this is only available as a private beta. If you would like access, please contact us.)
Deploying the Virtual IVI Development for Android requires some familiarity with AWS. You should be familiar with:
- Amazon Elastic Compute Cloud (Amazon EC2), for basic EC2 configuration
- Amazon Elastic Block Storage (Amazon EBS), for configuring the EC2 instance storage
- Amazon Virtual Private Cloud (Amazon VPC), for configuring an internet-facing subnet and a security group
The appliance uses the following billable services by AWS:
- EC2 and Marketplace appliance (see the AWS Marketplace product page for costs)
- Network egress (for example, see the Amazon EC2 On-Demand Pricing page for costs)
If you are looking for more help on any AWS topic, please check the AWS documentation: Amazon Elastic Compute Cloud Documentation
Virtual IVI Development for Android currently only supports x86 instances.
Check the prerequisites
You need to satisfy those prerequisites before starting your EC2 instance.
- Valid AWS developer account to create and subscribe AWS services; if not available, you need to sign-up for AWS account.
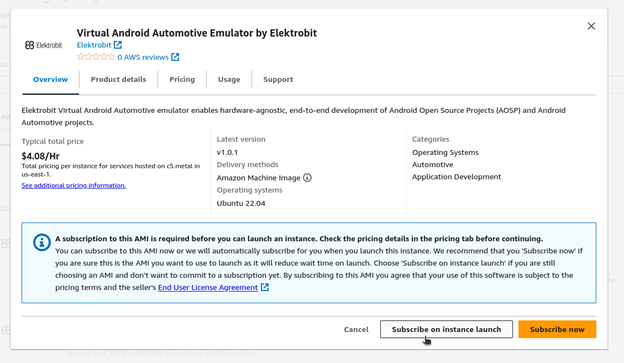
- Subscribing to the Virtual IVI Development for Android product on AWS marketplace (can also be done during the EC2 instance launch).
- Make sure to use the correct region in the AWS console.
Setup the EC2 instance
Create a new EC2 instance from the marketplace product. Go through the steps as shown on the page.
- Name and tags
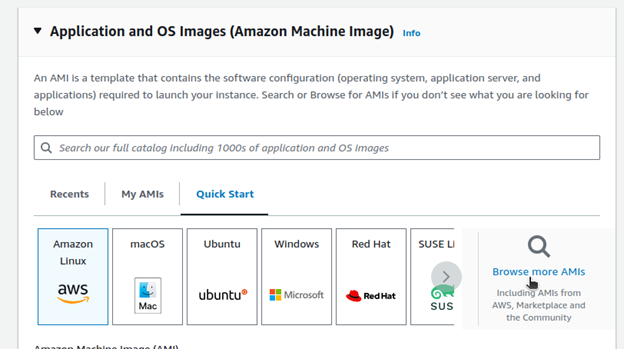
- Application and OS Images (Amazon Machine Image)
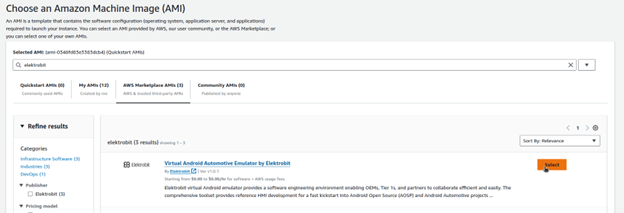
Either go through the marketplace page or (maybe slightly faster) search for the marketplace product when selecting the AMI in the EC2 console:
This will prefill most of the required fields (security groups, instance type, etc).
You should configure the following:
- Instance type
- Requirements: bare metal x86 instance. Bare metal is required as AWS does not allow nested virtualization, and virtualization is required to run the emulator.
- Verified to work on: c5.metal
- Key pair (for SSH access to the EC2 instance)
- Select your existing key pair or create a new one.
- See also Create a key pair for your Amazon EC2 instance
- We recommend importing a key instead of generating one in AWS.
- If you generate a key in AWS, you need to specify the key on the ssh call, e.g., ssh -i path_to_key.pem ubuntu@…
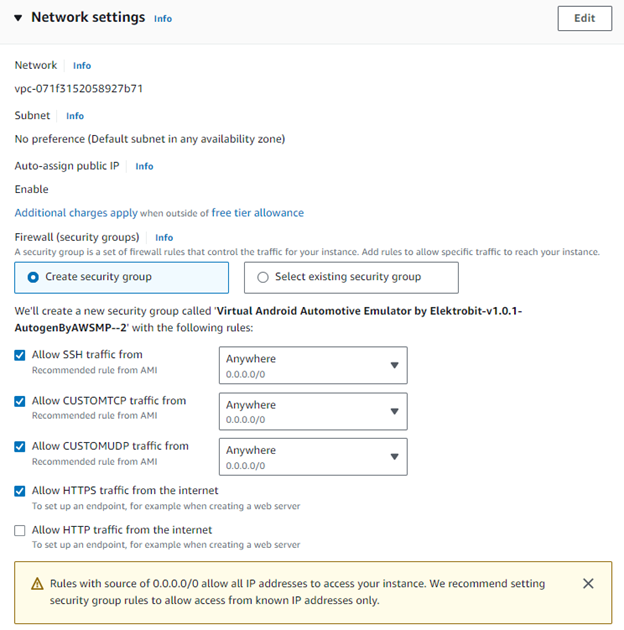
- Network settings (security groups)
- If you already have a security group, select an existing security group with the correct configuration.
- Requirements:
- tcp 22 (ssh)
- tcp 443 (https)
- Optionally: tcp 80 (http), this can be useful to automatically redirect from http to https.
- tcp and udp 3478 (turn for WebRTC)
- Optionally: tcp 32768-49151, this is required if you want direct access to adb ports.
- Optionally: You can restrict the source IP to your local IP.
- Sample network settings:
- Configure storage (EBS)
- Recommended minimum size: 50 GB
- Recommended for extended use by multiple people: 1000 GB
- Adapt the other EC2 instance settings as required for your AWS setup.
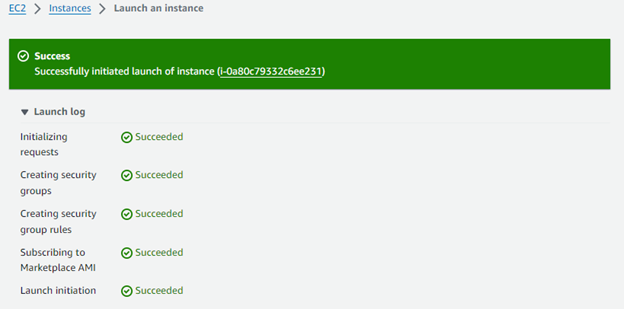
Check the summary on the right and click Launch instance
The following message will be displayed:
Click on the underlined EC2 instance ID to get to the details page. The details page will show Public IPv4 DNS. Use this to access the web page in your browser.
Note: After the instance is shown as running it might take a while until you can access the web interface.
Initializing EC2 instance & Cloud Emulator
It will take some time to initialize the EC2 instance for the first time. You can check the EC2 instance state in the AWS console.
Once the instance is in Runningstate, you can access the URL of the public DNS name in your browser. It still might take some time until the web page is available. You can click the open address button to open the landing page or copy the address to the web browser.
You will most likely see a warning about untrusted certificates. You can simply ignore this by clicking Advancedand clicking on the Proceed to … link:
The landing page will show instructions on how to finalize the setup of the EC2 instance. Follow the instructions there.
- Connect the EC2 instance via SSH (username: ubuntu).
- Option#1: If you uploaded your keypair to AWS:
- ssh ubuntu@[dns_url]
- Option#2: If you generated your keypair in AWS and downloaded it:
- ssh ubuntu@[dns_url] -i [local_path]/xxx.pem
- Option#1: If you uploaded your keypair to AWS:
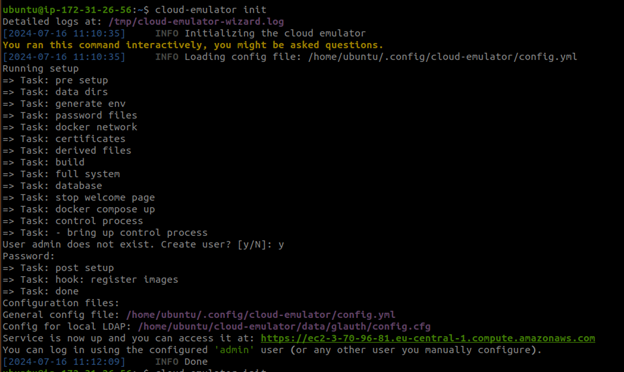
- Finalize the setup by running the command cloud-emulator init
- Then you will also be asked to create an admin user. Confirm this by typing y and Enter and set a password for the user. With this user you can later log in to the web dashboard. See also Adding users/changing passwords
- After the tge setup is done, you can visit the EC2 instance in the browser using the default DNS name (i.e., https://ec2-XXX-XXX-XXX-XXX.REGION.compute.amazonaws.com).
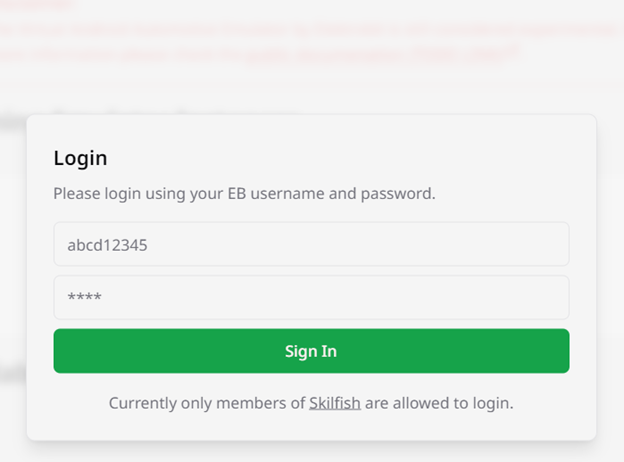
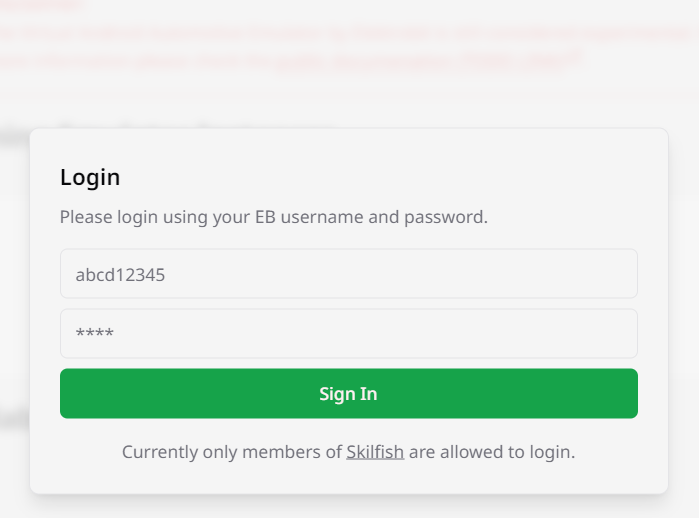
- Log in using the user admin and the password you just set.
For further steps, go to the Usage of Web -Dashboard section below for more details.
Administration of the EC2 instance
If the DNS name changes (e.g., if you stop and later start the EC2 instance again) or if you change the config, you need to re-run “cloud-emulator init”. This will temporarily stop the service and restart it with the updated configuration.
The config file is located at: ~/.config/cloud-emulator/config.yml
Adding users/changing passwords
To add a new user or change the password of an existing user, use the command “cloud-emulator change-password USER” (with USER replaced by the username).
This will prompt you to confirm creating the user if it does not exist yet. It will prompt you to input a password for that user.
For more advanced use cases you can either edit the file /opt/cloud-emulator/glauth/glauth.cfg directly or configure an external LDAP server in the config file.
Debug information
Note: You should not need to access these pages in most cases.
You can also access pgamin, traefik dashboard, and traefik prometheus metrics but only on port 8080 from localhost on the EC2 instance. So, for normal usage you should forward that port (e.g., via SSH) and access it locally. For example:
ssh -L 8080:127.0.0.1:8080 ubuntu@ec2-XXX-XXX-XXX-XXX.eu-central-1.compute.amazonaws.com
Then open:
- http://localhost:8080/dashboard/ (traefik dashboard)
- http://localhost:8080/metrics (traefik metrics)
- http://localhost:8080/pgadmin (pgadmin)
- User: admin@admin.com
- Password: see files /opt/cloud-emulator/data/secrets/pgadmin_password.txt
Usage of Web-Dashboard
You should be able to access the dashboard web UI in your browser with the Public IPv4 DNSname shown in AWS.
You can log in with the admin account you created during init, and you can also log in using any other accounts you create afterwards. There is no registration form.
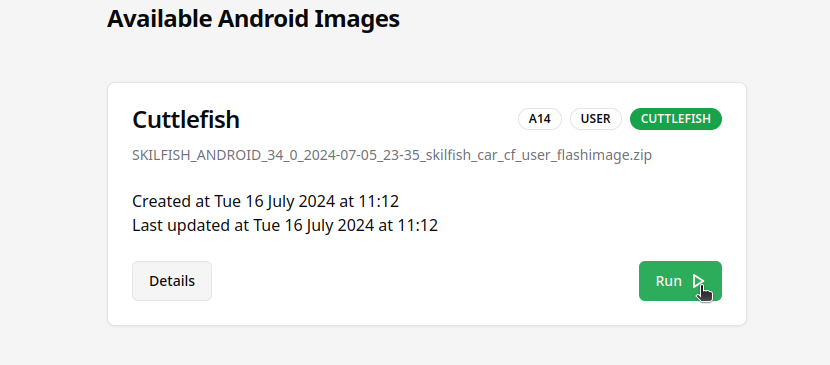
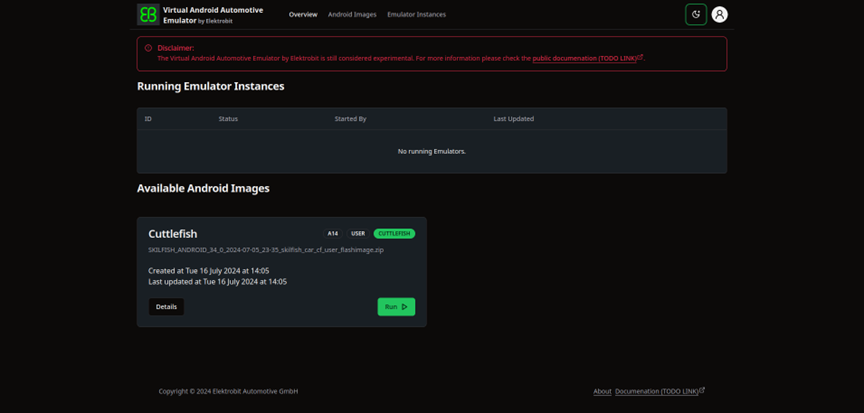
Once you are logged in, you should be able to see a list of all running emulators and a list of all Android images.
Running an Android Emulator
You can start an emulator by clicking the Run button in the image details.
This will initiate the creation of a new emulator instance and start it. It can take some time to start the emulator (especially the very first one because directly after boot the disk is not yet cached in AWS).
The started emulator instance will show up in the list of running emulators. It will go through the states: pending, setting up, starting, started, running.
Once the emulator is in the state started or running you can access its web UI by clicking on the open button in the list.
Note: The very first start of an emulator may take a long time. The reason for this is that the underlying disk (i.e., EBS snapshot) is not yet fully loaded/cached in the EC2 instance. Subsequent emulator runs should be much faster.
It is also possible that you will see “Bad gateway” when you first try to access the emulator page. This message should disappear after some time, and the emulator should work as normal.
Important: You can run multiple emulator instances at once. The maximum number of parallel emulator instances is mostly limited by RAM and disk space. We try to check some soft limits on emulator start, but if you run many emulators for a long time, it is possible that the disk will fill up and break the server!
It is also possible to connect the emulator via ADB (e.g., if you want to use Android Studio or push some files). To do this, first go to the details page of the emulator instance. You do this by clicking on the ID/Android image name:
Then, on your local machine, you can copy the ADB address and run:
adb connect ADDRESS
(This assumes you have the Android SDK installed and the adb command is available in your PATH.)
Note: Access to the ADB port is only possible if you allow the ports in the security group of the EC2 instance. Alternatively, you could use an SSH tunnel to make the port available locally.
Once connected via ADB you can access the emulator as if it is running locally. That means you can, for example, use it in Android Studio to run and debug an app.
It should show up in the device selection list:
You should be able to run and debug your app as normal.
For example, after clicking the Run button:
Logcat:
Aborting Emulator Start
Most of the time starting an emulator should just work. But in case it does not, you can go to the emulator details page (see screenshot above) and click the Abortbutton.
Cases where you might need to abort an emulator:
- It gets stuck in the setting up or starting state
- The database state and actual state is inconsistent (e.g., emulator is actually not running, but still shown as running).
- Emulator cannot be stopped normally.
In all cases, make sure to first wait for a few minutes so the system can try to self-correct.
Dark theme
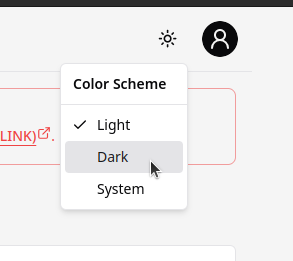
The Cloud Emulator also has a dark theme for the UI. By default, it will use your system/browser default.
You can change the theme at the top right after logging in:
Using Android Emulator
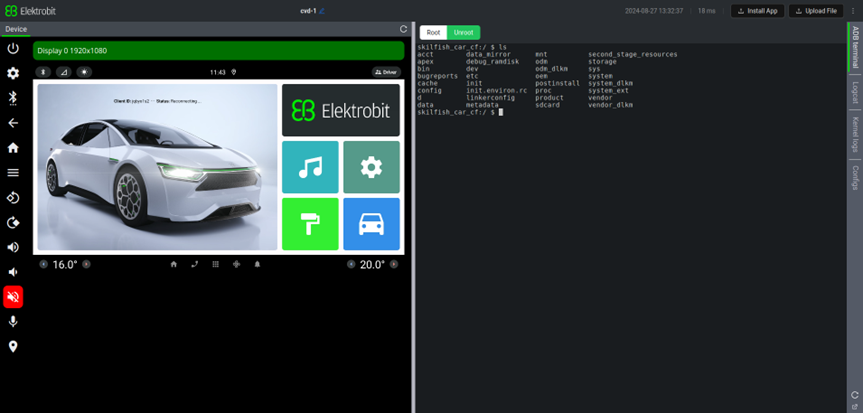
Note: You need to use Google Chrome or a Chromium-based browser to view the device screen. This is a limitation of Cuttlefish.
Note: You can share the link to the emulator page with other people and multiple people can access the emulator at once. This works for up to four people and is useful for peer work. But it can be confusing if multiple people try to work on the same emulator. For most cases it is better that each user uses their own emulator instance.
Features
- General AOSP Android Emulator Experience
- ADB Terminal of the emulator
- Logcat & Events & Kernel logs
- Upload and install a new local app for testing
- Elektrobit Vehicle Components with Home Launcher and App Grid
- Kitchen Sink app for testing AOSP & vehicle properties
- Truck application to experience vehicle functions
- Theming store to exchange themes system-wide and change look & feel
- Android keyboard, customized with handwriting, gesture & speech input
More features can be added on request. For reference, please see here: Solutions for intelligent automotive digital cockpits
For more detailed questions and requests, please contact us: support@elektrobit.com
Stopping Android Emulator
You need to go to the Web Dashboard again to stop the emulator, as shown below. When you are done with the emulator, you can stop it again by clicking the red stop button.
You can later initiate to start again as explained above in Running an Android Emulator.
Terminate the EC2 instance
While the EC2 instance is running, it will use AWS services and incur costs. If you do not need the cloud emulator anymore, you should terminate the EC2 instance. Note that this will also delete all your data! If you want to use the EC2 instance again later, you can also stop it instead of terminating it.
Related content

